Note that this feature is currently only available in designer applications.
Data captured with SpreadsheetWEB applications can be easily accessed from the Data page in the Control Panel. This centralized data capture system allows interacting with application data on different authentication levels for the end users.
The data columns on the Data page can be customized to display any system fields, or application fields that have been defined in the database module to capture user data. You can configure the Data page columns further by assigning data masks, assigning a field to open records in view mode, and editing column headers.
You can add new columns or remove existing ones to restructure the layout of the Data page. You can have a minimum of 5 and a maximum of 20 columns for any application.
To add a new column, begin by clicking the Columns button when you’re on the Data page of the target designer application.

Then, click Add New Column to insert a new column.

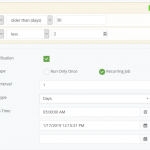
This will create a new row in the Layout table. Assign a name to this column by entering the text into the Empty field and define which field it is to display. When you’re done, remember to press the Save button to apply your changes.

The new column will now be shown on the Data page with the selected properties. You can reorganize the order of the columns using the up and down arrows. To remove an existing column, simply click the red button next to it.

The data page will look like below with the new column.
 Note that this is done on an application-by-application basis, and your settings in one application will not transfer to other applications under your account.