In SpreadsheetWeb Hub, you can apply internal hierarchies and configure who can and cannot access records created within the application with the new ‘Tag’ feature. The ’Tag" feature is a completely flexible approach, which you can specify the rights of users belonging to the workspace.
In this article, we will take a fictitious insurance agency selling homeowners insurance to its clients. Their sales people were using an Excel-based insurance quoting tool. With SpreadsheetWeb, they converted this Excel-based tool into a web-based application. But they also need a way to manage and share these quotes within the sales department. We will show you how you can use tags to manage access to the sales quotes created by sales people in different positions working within the company and how they can configure a workflow to manage the lifecycle of a quote,
Let’s say this agency has two branches in 2 different regions. Each branch has 1 Sales manager and 2 Sales person. Also, both managers report to the VP of Sales. In such a case, you must first create a tag for both regions, we created them as ‘Region 1’ and ‘Region 2 ‘.
We will also configure a workflow to manage the lifecycle of a quote from its creation to completion. To do this, create tags indicating the stages for the ’Quoting Status". We have created the following 4 stages, you can name these stages as you use them within the company.
- New. This is when a new quote is created.
- Pending. This is when a quote is being worked on.
- Bound. This is when a quote is sold.
- Cancelled. This is when a quote is not sold.

The next step after creating the tags is to create Identity Templates to determine the access and record viewing permissions of the Sales Managers and Sales Person of both regions within the workspace. You can follow these steps to create identity templates:
1. Create Sales Person Template for each region.
- Select the appropriate region tag in Workspace Rights > Is Associated With field.
- Make sure at least Read-only Access to All Applications is selected for Application Rights.
- Add Edit Access to Application Data Associated Tag right for Data Rights and make sure to check Should these tags be evaluated conjunctively? option. This option will ensure the user to see their own data records. Because the rule checks if a data record contains both region and user tags.

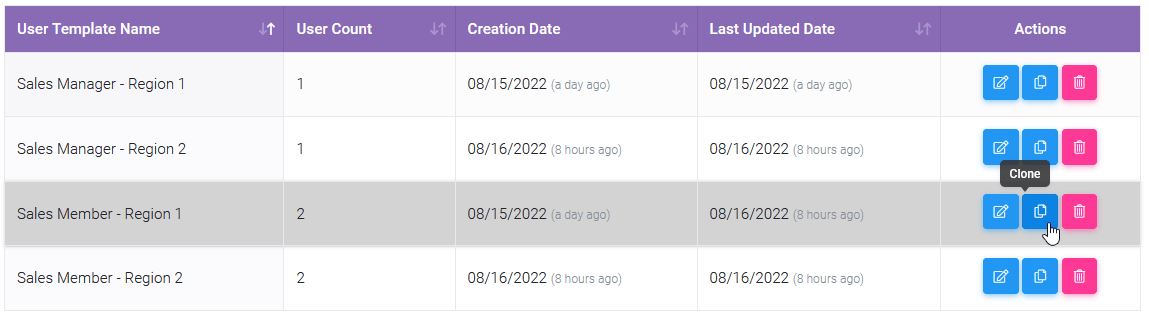
2. Create Sales Manager Template for each region.
Tip: A sales manager template is almost identical with a sales member template. Thus, you can use the Clone button to copy and modify an existing template.
- Select the appropriate region tag in Workspace Rights > Is Associated With field.
- Make sure at least Read only Access to All Applications is selected for Application Rights.
- Add Edit Access to Application Data Associated Tag right for Data Rights and make sure to leave Should these tags be evaluated conjunctively? option unchecked. This option will ensure the manager to see all data records which contains associated region's tag. Because the rule checks if a data record contains either region or user tags.

3. Create VP of Sales Template to see all records in both regions
- Select the appropriate both regions' tags in Workspace Rights > Is Associated With field.
- Make sure at least Readonly Access to All Applications is selected for Application Rights.
- Add Edit Access to Application Data Associated Tag right for Data Rights and make sure to leave Should these tags be evaluated conjunctively? option unchecked. This option will ensure the VP of Sales to see all data records which contains associated region's tag. Because the rule checks if a data record contains either region or user tags.

After creating the Identity Templates, you can invite users to your workspace. You can select Identity Templates while inviting them to the workspace.

After invited users approve their workspace invitation, their workspace permissions specified for the selected template will be applied to their accounts.
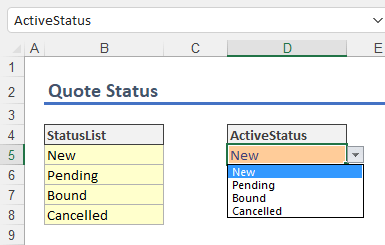
To use Quoting Status while creating new records, you need to modify the Excel File related with your application and add Quote Status options with a named range for the UI input.
Save your file and go back to your SpreadsheetWeb Hub Applciations page, open the Designer and add Quote Status input to the UI and make sure to add the field as a data field to preserve the state in the database as well.

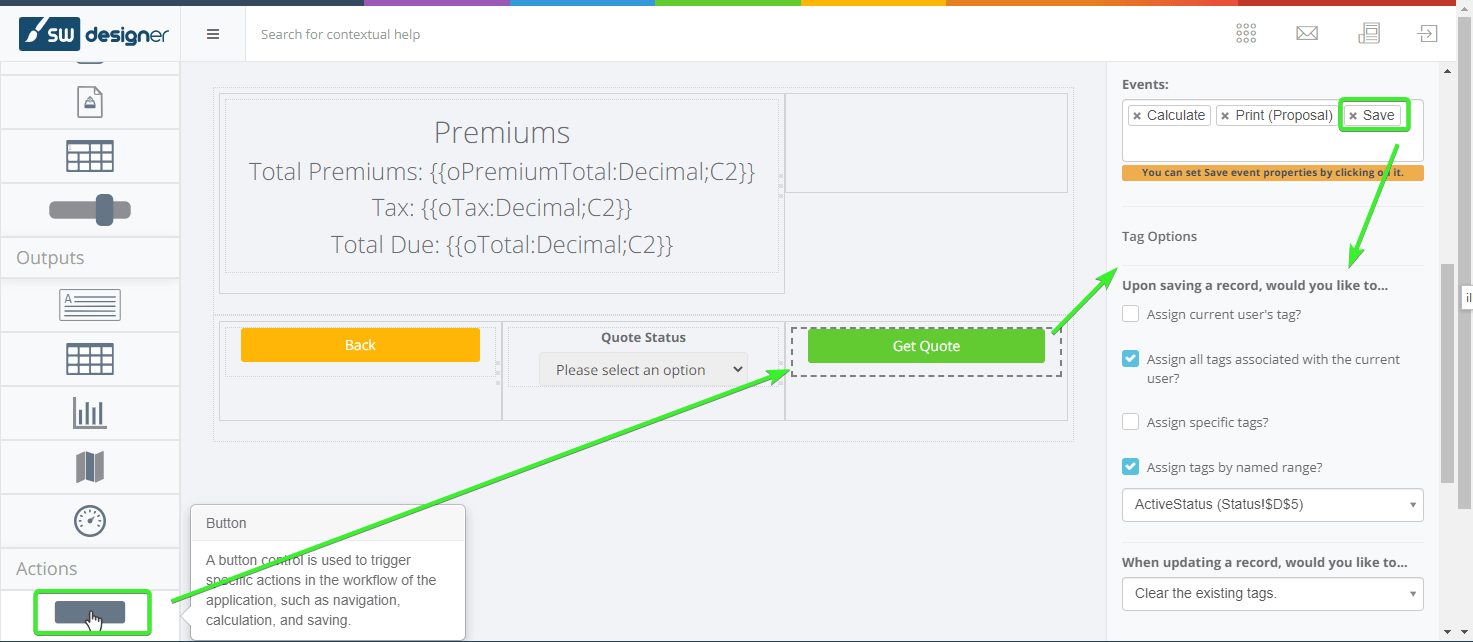
Also, add a button with Save event to record your data. You can find tag-related properties after adding the Save event:
- Mark Assign all tags associated with the current user? option to assign user's own and associated region tag.
- Mark Assign tags by named range? Option as well and select the named range that is bound to quote status. Selecting this named range will ensure the selected status tag will be assigned to the record.
Do not forget to Publish your application to apply all changes.
After the application is published, created records will be displayed to users according to their assigned identity templates. For example, VP of Sales will see all created records when they open the data page of the application as shown below:

Region 1's Sales Manager will be able to see all records created by Region 1's Sales persons ( We added those users as Sales person 1 and Sales person 2) as shown below:

Region 2's Sales Manager will only be able to see records created by Region 2’s Sales persons (Sales person 3 and Sales person 4) as shown below:

A Sales person, on the other hand, will only be able to see the records created by themselves.
For example, Sales person 1’s view will look like this:
And Sales person 2’s view will look like this:

On the application's data page, the "Region" and "Quoting Status" tags will be displayed. The status tags can be updated by editing the record.
In SpreadsheetWeb Hub, you can use Tags to determine user roles, and manage user rights within your workspace. In addition, for your applications, you can create tags related to your internal business processes to track processes such as quoting status, workflow, and payment trackings up to date.