Saving data is crucial for web applications where you need to capture user information. Subsequently, the way you structure database tables can save you the headache when it’s time to analyze the data collected. In SpreadsheetWEB, designer applications can store input and output fields when you define them in the database designer. The database tables, as well as individual data fields must be defined before the system can start capturing user data. In this tutorial, we’re going to show you how to configure the database component of your designer application.
Let us show you how this works on an example. We’re going to be using a health insurance rating application that can capture the information of thousands of users, and calculates premiums for different plans based on their data.

To define the database tables, begin by pressing the databases icon when you are in the designer interface.

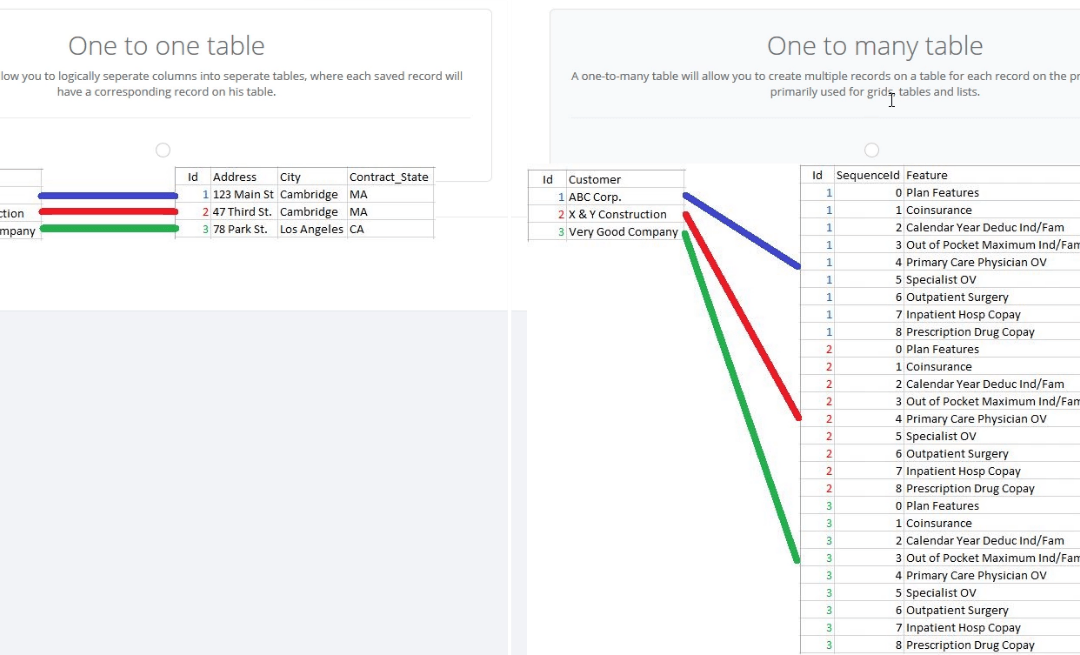
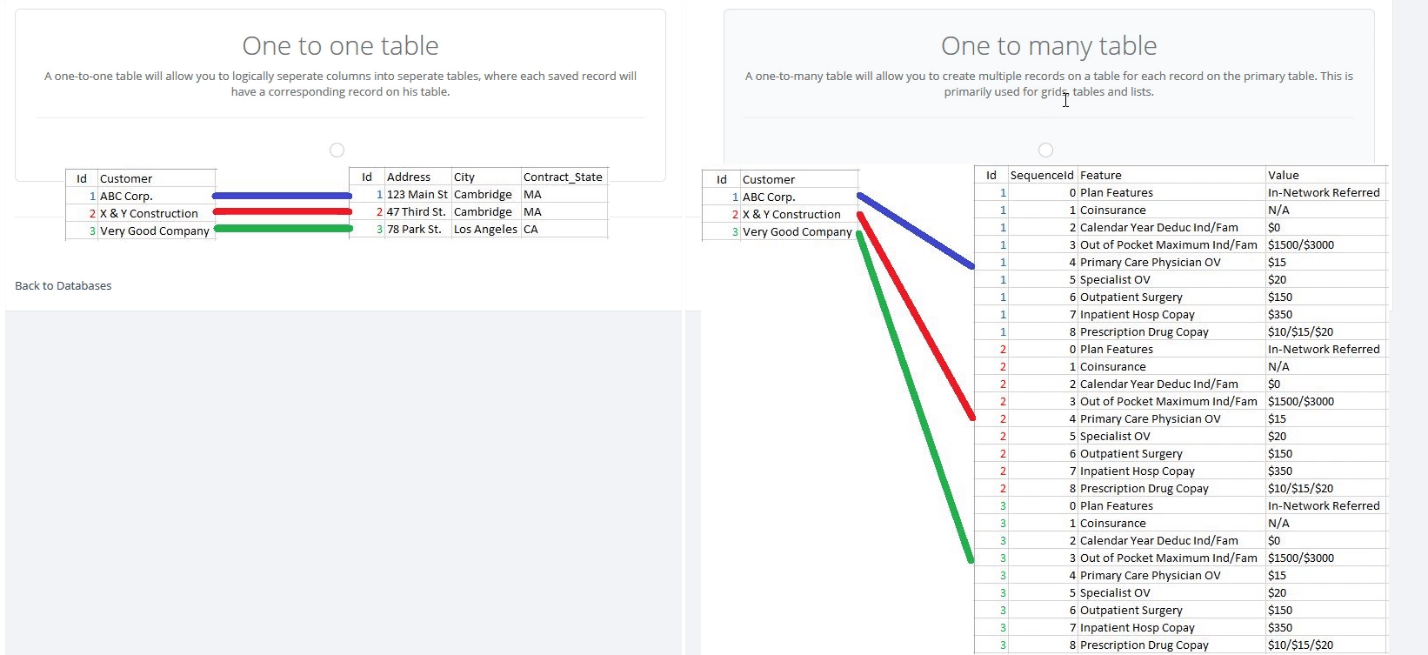
In all designer applications, the first table created is going to be the primary table. An application can have one primary table, and any number of secondary tables. Using only a primary table should be enough in most applications. However, you should consider using secondary tables, especially if you have a complicated data model. For example, capturing sales data for 50 states, over the span of 10 years will result in a fairly large data table, and it will make more sense to save this data into a secondary table. Data that is populated on secondary tables are tied to the primary table through the use of the ID columns. This can be also useful for keeping different data in different tabs, or avoiding the tables with too many columns. Below is an illustration of a sample structure.
Let’s begin by creating the primary table. You can choose to create the database before or after creating the web UI. If you choose to leave the database for later, it’s going to be a bit easier to add the save fields using the Add Used Columns button. This action will take you through all fields that were used in the User Interface Designer. Alternatively, you can click the Add button to add named ranges individually. The Data Type selection will determine in what format the data field will be stored in the database. Selecting integer for numeric fields, for example, will make it easier to analyze the data when you export it. It is also important to set the maximum value and size fields during the creation process, as this will help to optimize the database size.

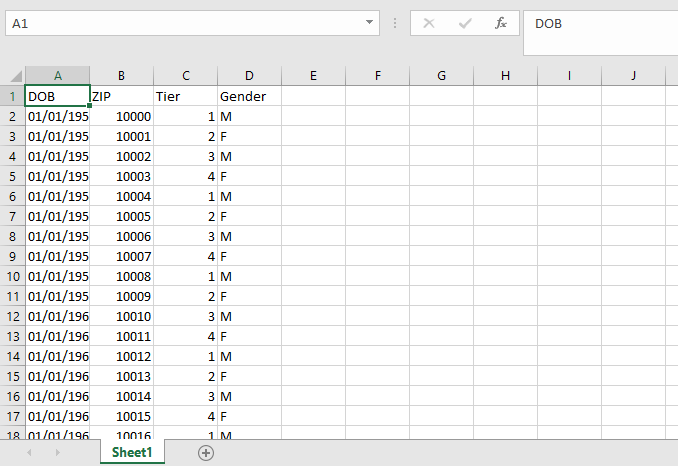
The table on the bottom of the Input page of our application stores the user details for the proposed plan, and it can accept up to 10,000 rows of data. Below is a partial view of the data we want to copy into this table.
Instead of assigning a column to each input in the primary table, we’re going to be able to establish a ‘one to many relationship’ between the top section (company details) and the bottom (user details). To do this, we need to click Add New on the Database Designer page to add a new table, and select One to many table.

In the second table, we’re going to add the data fields for the input grid – DOB, ZIP, Tier, and Gender.

Finally, the export of the database for our application is going to contain 2 sheets – the primary table and the secondary table. In the export file, we can see that the primary table information is matched with the secondary table through ID field values.

Also check out our related video below!