Excel's versatility goes beyond mere number crunching; it empowers users to enhance their experience and streamline data entry through the implementation of dropdown lists. The dropdowns are great tools for either increasing the end-user experience or limiting the end-user with specific options to select from. You can use Data Validation Lists to create your own dropdowns in Excel. Among the array of features Excel offers, the dropdown list stands out as a valuable tool for both improving user interaction and enforcing specific options. This guide is your gateway to mastering the creation of dropdown lists in Excel, exploring three distinct methods that cater to different needs and preferences. From static values to dynamic formulas, we'll walk you through the steps, ensuring you wield Excel's potential to its fullest.
Data Validation Lists
Before starting to create a dropdown list, let's check out how you can access Data Validation dialog and select correct options to generate a dropdown.
While a cell in a worksheet is selected, activate Data tab in the Ribbon. Click the Data Validation icon in the Data Tools section.

In the Data Validation dialog, remain in the Settings tab. Select List option in the Allow dropdown. This action makes the Source input box visible.

From this point, we are ready to set items for our dropdown. We can use the Source input to type items manually or enter a reference to a list of items in the workbook. An alternative use of the Source input is entering a formula that can generate a list array of items.
After setting source, clicking OK to create a dropdown list in Excel.
Static values
The first method is to enter the items one-by-one by typing into the Source input box. Separate each item with a comma (,).

This method is faster if you have fewer items to list. On the other hand, you strict yourself with the Data Validation dialog when you need to update these items. The following approaches offers more versatile ways.

Data from Reference
The next method is the probably most common method to create a dropdown list in Excel. You can actually enter a reference of a range that contains a list of items.
Note that, the range should contain a single row or a column. You cannot use a range which has both multiple rows and columns.
There are a few ways to enter a reference into the Source box:
- Typing the reference manually: Just type the reference of the range. For example, =Dropdown!B3:B8. Use the exact same syntax which you use in the formulas.

- While the Source input is active, use your mouse to select the range you want. You can understand if the Source input is active by looking at the cursor. If you see the cursor flashing in the input box, you are good to go.
- Similarly, you can click the icon

- If you are using named ranges in your workbook (actually we recommend this approach), Press F3 key on your keyboard to open Paste Name The Paste Name dialog lists the names in your workbook. Double-click the name you want to select. Aside from other advantages of using named ranges, you do not need to open the Data Validation tool to update the list. Once the named range is updated, you will get the updated list as well.


This is how it looks:

Create a dropdown list by Excel Formula
The final approach is a using an Excel formula to populate a list items dynamically. This approach also works with dropdowns dependent other inputs or dynamic-sized dropdowns.
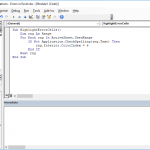
In our example, we demonstrated a common use case, creating a dynamic dropdown with INDIRECT function. We have two lists of Pokémon names. While one list contains Fire types, the other has Water types. Both lists are named as "Fire" and "Water" based on to their contents. As you know the INDIRECT function returns the reference given as string. As a result, =INDIRECT("Water") formula returns the named range Water.
If you use a cell reference instead of static "Water", you will get a dropdown list updated by the cells value. In our example, we used the following formula which calls the named range entered in Type:

With this setting, the dropdown list contains Fire type Pokémon's if the Type is "Fire".

In conclusion, the ability to create dropdown lists in Excel using Data Validation Lists opens up a world of possibilities for efficient data entry and user-friendly interfaces. Whether you opt for static values, references from a range, or harness the power of Excel formulas, this guide has equipped you with the knowledge to implement dropdowns seamlessly. Empower your Excel skills, simplify data input, and elevate user experiences by incorporating these techniques into your spreadsheets. Download the workbook, follow the steps, and watch as Excel transforms into an even more powerful tool at your disposal.