A radio button, also known as option button, an input type that allows user to select from a list of pre-defined options. Radio buttons are useful if you want to limit the end-user to select a single option from a list. While a radio button looks more user-friendly, a dropdown will be better choice if you have too many items. Also, you can group a number of checkboxes if you want your user to select multiple options. In this guide, we are going to show you how to create radio buttons (option buttons) in Excel.
Developer tab
First of all, you need to activate the Developer tab in the Ribbon, if you haven't already. This tab contains the form controls including the radio button. Let's make it visible.

Microsoft thinks that the Developer tab may be confusing for most users. So, the tab is hidden by default. To display the Developer follow the steps below:
- Right-click on the Ribbon
- Click the Customize the Ribbon option
- Enable the Developer check box under the Main Tabs
- Click OK to display the Developer tab in the menu.

The tab will remain there until you hide it again, or re-install Excel.
You can get more information from our specific guide: How to display the Excel Developer tab for using advanced features
Adding radio buttons
- Once the Developer tab is visible in the Ribbon, you are ready to create radio buttons.
- Activate the Developer tab first
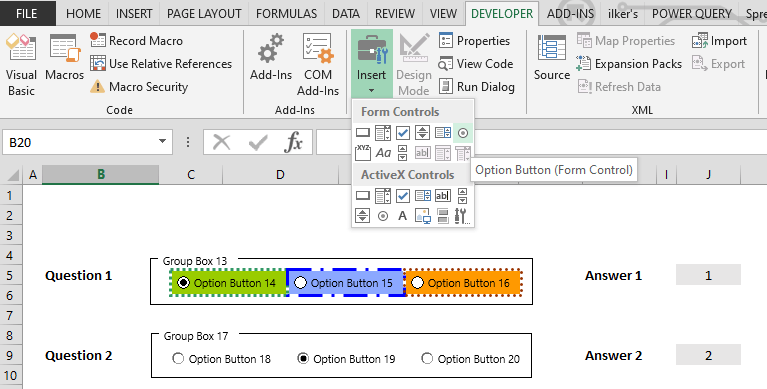
- Click Insert in the Controls section to see the list of controls
- Click Option Button (Form Control) icon in the Form Controls section
- Previous action will change the mouse pointer. Now on you are ready to insert a radio button.
- Just click anywhere on the worksheet to add a radio button in default size. Alternatively, you can alter its size before adding by holding the left-click and dragging.

Congratulations! You have created a radio button. However, as you may guess that a single radio button is meaningless. Obviously, you need at least two to present multiple options to the end-users. So, create as much as you need.
Linking radio buttons
You can start to use the radio buttons right away. However, linking them with a cell increases the end-user interaction with your workbook. The option buttons return an integer value that specifies the selected option. The values start from 1, so you can use them in your formulas.
To link the option buttons with a cell, follow the steps below:
- Right-click on any of your radio buttons
- Click on Format Control item in the context menu
- Activate the Control tab
- Set a cell into Cell link property
- Click OK to finish

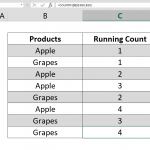
After a cell is linked, the cell shows the selected option button's index. You can now use this value in your formulas.

Grouping radio buttons
If you want to use option buttons for more than one entry, you need to group the related radio buttons. Otherwise, Excel thinks all radio buttons in the worksheet are connected and link to the same cell.
You can avoid these type of scenarios by combining radio buttons under different Group Boxes. A group box is another form control like the radio button. You can find it in the same Ribbon.
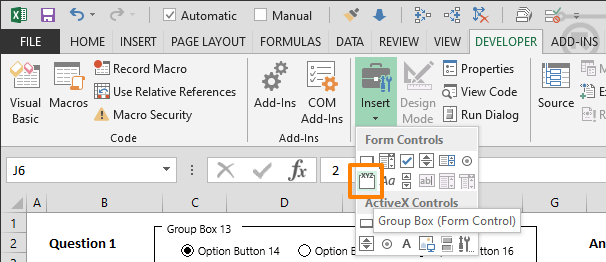
After clicking the icon, draw a rectangle large enough to fit your radio buttons. Radio buttons placed in a group box can use their specific cell link.

Customize radio buttons
Excel auto-generated names like "Option Button 42" for each radio button. But you can their names as well border, background color and 3D shading.
To update the name, right-click on the radio button and click the option named Edit Text.

The background color and 3D shading properties can be found in Format Control dialog. Use the Color and Lines tab to apply a background color as well as borders.

Open the Control tab to find the 3-D shading property. Enabling this option applies 3-D shading to your radio buttons.