Salesforce is one of the most popular CRM applications on the market, as evidenced by its immense user base. The sheer level of customization available allows businesses to tailor the front-end to their precise business needs, whether that includes use of existing stock modules that are packaged with the application or highly-specialized tools developed by internal developers in the Salesforce sandbox. From marketing to service, it covers almost all aspects of customer relations and employs numerous tools for in-depth data analysis.
Salesforce has been in the market for many years, dominating the industry. As cloud technology boomed, the company made the transition to allow for better accessibility and collaboration. In addition to a very extensive list of features, there are also plenty of third-party services that complement the platform. It works seamlessly, integrated with in-house applications and other resources.
Sales-oriented professionals use to keep track of leads, process client information, and analyze business trends. However, there are still some tasks that need to be performed manually, such as generation of sales quotes. For instance, a shipping company may charge its customers based on their location, whereas an insurance company may use dozens of demographic parameters.
In this case, a salesperson needs to retrieve customer requirements from Salesforce, enter these into a calculation model, and then re-enter all of the figures into Salesforce again. This reveals a missing link in the process: Salesforce is not a “one glove fits all” platform out of the box, since every business uses different business logic and requirements. SpreadsheetWEB can easily plug in this gap and automate the complete data flow within a company.
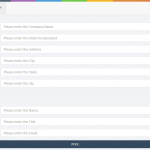
Step by step, let us walk you through how you can integrate Salesforce with SpreadsheetWEB and publish a shipping cost calculator on the web. The menu for creating a new Web Service via SpreadsheetWEB’s Control Panel can be seen below.

Upload your document and fill out the other fields. We will use the unique Application Key later, in order to establish a connection between the workbook and Salesforce.
After uploading the application as a web service via the SpreadsheetWeb Control Panel, we must look at the structure of the inputs and outputs (I/O) in the Excel file that we plan to use as the base of our spreadsheet-based microservice. For our purposes, the spreadsheet file is used to calculate the estimate shipping cost of a product based on the originating ZIP code, the destination ZIP code, and the weight of the package.

The I/O mapping are shown below:
| Type (I/O) | Name (Identifier) | Label |
| Input | originZip | Origination ZIP |
| Input | destinationZip | Destination ZIP |
| Input | weight | Weight (lb) |
| Output | cost | Cost ($) |
Before we begin, from the SalesForce advanced settings section of your personal account settings (Personal Settings > Personal > Advanced User Details), you must enable the developer mode, as shown below.

Now, we must create fields that correspond with these inputs and outputs in the target SalesForce model in order to store the I/O information. For the purposes of this demo, we have used the Opportunities object, which comes stock with the default SalesForce implementation, but this model could similarly be tied to a custom controller and custom object model, as well. The model can be edited from the Build > Customize > Opportunities > Fields page.

We must create custom fields that match up to the I/O in the Excel file. We use the New button to create these fields and subsequently have the following custom fields tied to the Opportunity object.

Next, we will have to create a custom VisualForce page. The simplest way to do this is to enter a URL into your browser that corresponds with the following pattern: https://yoursalesforcedomain/apex/yourCustomPageName.

You will be redirected to a screen that shows that you do not yet have a custom page based on the target URL. From here, you simply click the “Create Page yourCustomPage” link to generate the new custom page along with the default markup.

You can then edit this page. We will include the four I/O fields that are now tied to our Opportunity object, corresponding with the I/O in the spreadsheet file/spreadsheet-based microservice. We will also include a reference to the hosted SpreadsheetWebAPI JavaScript library (located at https://trial.spreadsheetweb.com/spreadsheetweb-api-adaptor.js).

There are a couple of things to note here:
- The controller that this page is tied to is the Opportunity controller, which is a standard controller.
- The four input fields have defined IDs, which help to more easily identify them via jQuery.
- The four input fields are mapped to the controller object’s custom fields.
- There are two buttons – one to calculate the shipping cost and one to save the inputs on the screen.
From the spreadsheet-based service perspective, the code that performs the mapping to the API reference library and the mapping back to the UI lives in the CalculateShipping function. The inputs from the given input fields are mapped to the inputs object array (originZIP, destinationZIP, weight) based on the field names in the Excel file and the output is requested in the output array (cost). The callback to the Calculate function remaps the output value (cost) to the field on the screen (shippingCost).
The application key is the same key that was generated when we uploaded the spreadsheet file to the Control Panel.
Next, we are going to create a custom button that will navigate to this particular screen. To do this, we navigate under Build > Customize > Opportunities > Buttons, Links, and Actions.

Here, we will create a custom button that navigates to our new custom page.

Finally, we will add all of these fields and the button to the Opportunities page. We are making the fields readonly on this screen, since we want our users to hit the button in order to calculate the shipping value.

Now, when we visit an existing Opportunity via the Opportunities tab, we will see the new button available, along with the readonly values that are already submitted. We can click the Calculate Shipping Cost button to be navigated to our new custom screen.

Now, we can simply change the values for the source and destination ZIP codes, hit calculate, and it will populate our cost of shipping accordingly with results from our new Excel-based microservice!

Upon saving, the new value will be mapped to the Cost of Shipping field on the Opportunities object and we have successfully integrated the spreadsheet-based service with our SalesForce platform.

We can also subsequently create custom pages for the New and Edit pages that will correspond with our added custom changes for consistency (i.e. require the end user to select Calculate button in order to calculate the shipping costs via our new shipping calculator on both of those screens). These changes effectively follow the same pattern described above, except these screens will also include all of the additional fields that are required in order to save the model.
Salesforce has been on the market for over a decade and it has accumulated a large user base. While it is certainly a powerful data entry and processing platform, capitalizing on all of its potential requires a lot of expertise and will often require integration with several third party applications. Here, we supplemented the target Salesforce application with spreadsheet calculations and further expedited the sales process by converting a previously-manual task into an automated process, fueled by the connection to SpreadsheetWEB’s API.
No matter the complexity of the business logic, organizations should always seek to integrate more of their business logic directly into their IT operations. SpreadsheetWEB can skillfully complement the modular structure of Salesforce: integrating the two platforms expands business-level data automation to a new horizon.