Blank rows can be a not so small nuisance in data collection applications. In addition to making data management harder, an unorganized data set filled with blanks can mess with your calculations. Furthermore, Excel uses blanks as limits of ranges when you add a table, sort, or filter data. There are various ways to do this in Excel, but one of the easiest ways to get rid of empty cells is using this method. In this article, we're going to show you how to remove blank rows in Excel using sorting features.
How to remove blank rows in Excel
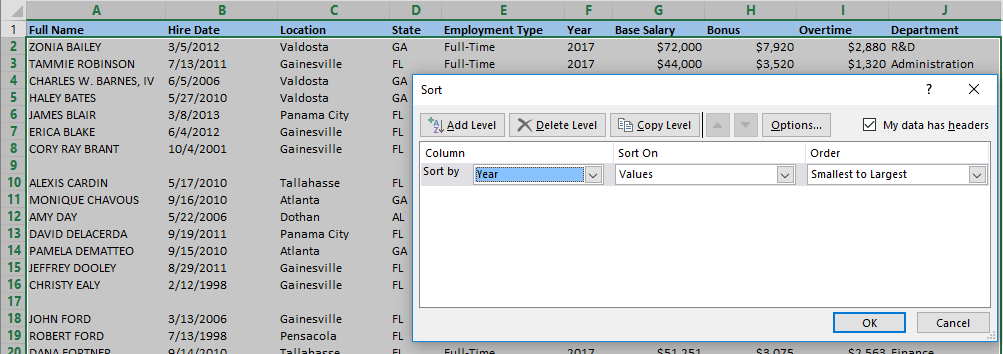
- Select your data containing blank rows
- Open the Sort dialog box from DATA > Sort path in the ribbon.
- In the first dropdown, select the column that you want to remove the blanks from.
- Select sorting order in third dropdown.
- Add new dropdowns for any additional columns by clicking Add level button.
- Click OK to apply sorting.
The sorting process will automatically move the blank rows to the end of the selection, and voila! The unwanted rows have been removed from the bulk of your data.
For more information about the sorting feature in Excel, please see The crux of organizing your data: How to sort in Excel