By default, Excel will cut off the characters that don't fit into a certain space. An alternative approach is wrapping the text to fully display it by increasing the cell height. In this guide, we’re going to show you how to wrap text in Excel. These methods should work pretty much all Excel versions.
The wrap text allows displaying a long string by distributing the text into multiple lines. There are two ways to enable the wrap text feature:
- When the target cell is selected, click on the Wrap Text icon under the Alignment group of the HOME tab.

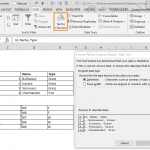
- When the target cell is selected, press Ctrl + 1 to open the Format Cells menu. Go to the Alignment tab and enable the Wrap text option.

How to manually wrap text in Excel
If a text contains line breaks (meaning that text was entered into more than one lines), Excel will enable the Wrap Text feature automatically. You can add line breaks to your text to manage break points. In text editors like Notepad or Word, pressing the Enter key is adds a line break. In Excel, however, pressing Enter selects the cell below. To create a line break in Excel, you must use the Alt + Enter key combination instead of Enter to add line breaks and enable the Wrap Text feature.
Issues
Let's take a look at some scenarios where wrap text will not be enabled automatically. This typically occurs if row height is fixed or cells are merged.
Fixed row height
Wrap text feature won't work if the row height is set manually. You can apply AutoFit Row Height to that row as a workaround.
When the cell is selected, click on the AutoFit Row Height from the HOME > Format dropdown.

Merged cells
The Wrap Text doesn't work with merged cells. Unfortunately, the only way is to fix this is by "un-merging" the cells.